If you’re looking for ways to boost WordPress security, then one area that you should consider is by blocking people from being able to browse your directory files. Here’s how to disable directory browsing in WordPress using .htaccess?
Why Disabling Directory Browsing is Good for Security
Stop and consider this for a moment:
Let’s say that you have one of those cabinets made for keeping your personal and private files you wish to keep in a safest place. Now, even though you likely don’t have those under lock and keys, it’s pretty much a given that people should stay out of that cabinet unless they get the go-ahead from you.
Now imagine that you find someone going through those files without your permission. Wouldn’t you be annoyed and cautious of that person’s intentions?
Most of us would. And my guess would be that you would probably start locking that cabinet up from that point on.
Well, this somewhat illustrates the importance of your directory files on your WordPress websites.
Those files are important and you would think that people would have the civility to keep their nose out of things that don’t belong to them, but history paints another sad reality. Truth is that your site’s directory files are on display for anyone in the world to find if they know where to look, and they’re easy to find.
If you do this to your own site and you find a similar picture to the one mentioned below, then your directory files are accessible to anyone and everyone who wants to take a peek.
That’s a bit frightening when you consider that these files contain sensitive information. It can give access to the hackers finding a way to sneak in and tamper or virtually set your site ablaze. Thus, keeping a WordPress backup of your website is also necessary to prevent and reinstate the files if something went wrong.
Want to prevent that from happening? Then there is a simple fix to put your files under lock and key.
Disable Directory Browsing in Your WordPress Site
Now, you’re going to want to access the .htaccess file of your site. You can do these one of two ways:
- Using an FTP client like FileZilla
- Through your File Manager in your host’s cPanel
For this WordPress tutorial, I’m going to explain how to do this through your CPanel.
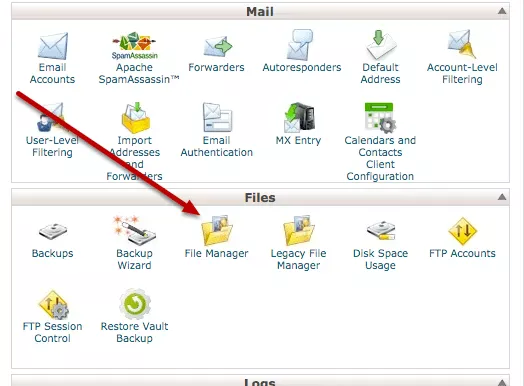
Next, go down to the Files section and click on File Manager. Once you click there, you’ll have a box pop up asking when files you wish to look at (the files in a certain URL).
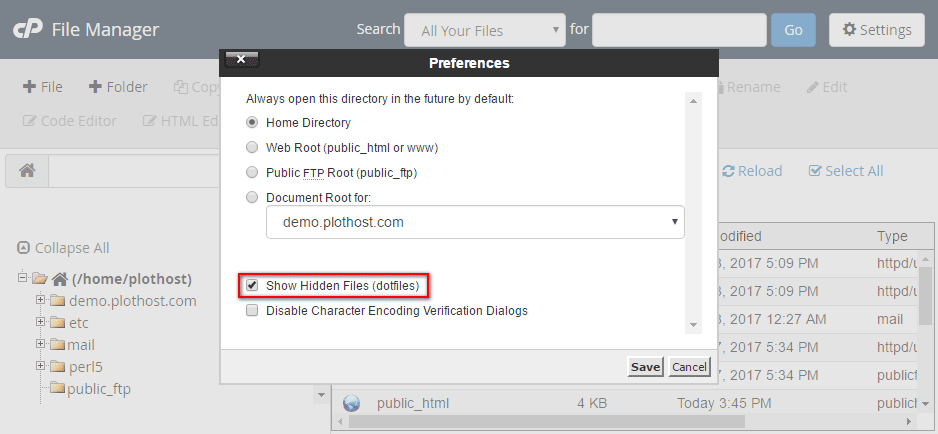
Select the Web Root directory option, select your domain and then make sure to check the box that says Show Hidden Files.
You will see listing with all the files within that certain domain. Scroll through the files that appear and look for the .htaccess file.
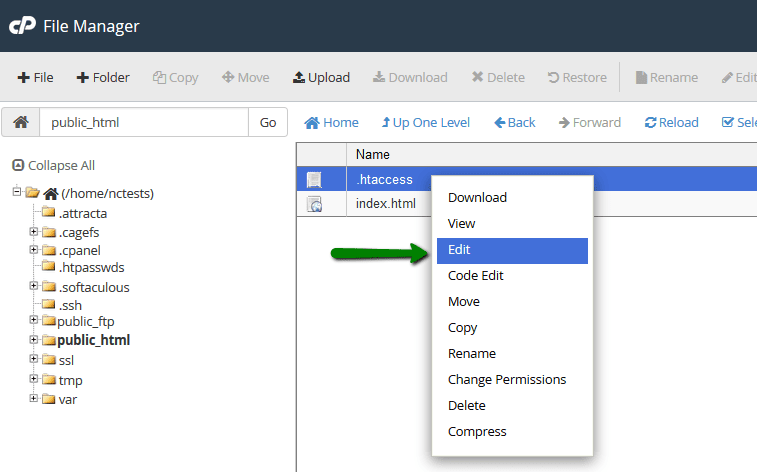
Before you open the file, download it and keep it somewhere safe. Next, click on the file and then go to the top of the screen that says View to that you can view the file. There you should find a few lines of code including the following:
# BEGIN WordPress

RewriteEngine On
RewriteBase /
RewriteRule ^index.php$ – [L]
RewriteCond %{REQUEST_FILENAME} !-f
RewriteCond %{REQUEST_FILENAME} !-d
RewriteRule . /index.php [L]

# END WordPress
Now take the following code:
Options All -Indexes Your code will be look like the following code snippet.
# BEGIN WordPress

RewriteEngine On
RewriteBase /
RewriteRule ^index.php$ – [L]
RewriteCond %{REQUEST_FILENAME} !-f
RewriteCond %{REQUEST_FILENAME} !-d
RewriteRule . /index.php [L]

# END WordPress
Options All -Indexes
Save your changes and you have no locked down your directory from prying eyes. You can double check this by going to your site and adding /wp-includes/ to your URL again.
If you’ve done this correctly, you will get a 404 Error or Permission Error which means that your efforts have been successful!
Conclusion
Even though this isn’t a necessary step, it’s probably a step you should be taking anyway. Your files are important and should be kept private.
It will take a few minutes to do this, but it’s better to keep things safe.
